Here we will give you a quick outline of the interface. See the RISA-Tekla Link Connection Procedure and RISAConnection Behavior topics for more information.
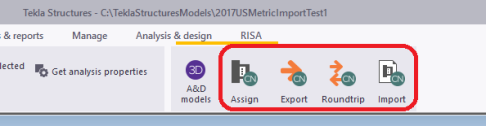
After the link is installed, RISAConnection buttons will appear in the Tekla Structures interface as follows.
|
|
| Tekla Structures 2021 |
The RISA - Assign Connections  selection is used to determine which connections you wish to transfer to RISAConnection. By default all connections are exported.

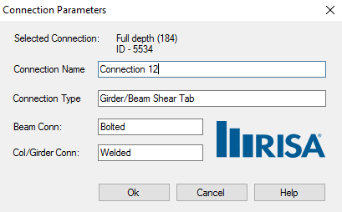
The main function of this dialog is to determine which connections you want to send to RISAConnection for design. You may wish for some connections not to export to RISAConnection if they've already been designed, or if you know that RISAConnection does not yet have the capability to design that type of connection. The connections with checkboxes checked define the connections that will be designed with RISAConnection and the program defaults to include all connections. From there you can click to uncheck a given connection, or use the buttons to the right. The functions are as follows:
The RISA - Design Connections  selection is used to send the Tekla Structures model to RISAConnection for connection design. From RISAConnection the connections can have their pieces and parts updated to create a connection that passes all code checks/limit states. Pressing the Export to Tekla
  button from RISAConnection will update the Tekla Structures model with any changes from RISAConnection. See the RISA-Tekla Link Integration Procedure for step-by-step information.
The RISA - Roundtrip Design Connections  selection will do a full round trip between Tekla Structures and RISAConnection. This means that the model will be sent to RISAConnection, any applicable connections will be checked/solved in RISAConnection, and the model will then be exported back to Tekla Structures. Be very careful using this tool, as many changes can potentially happen to the Tekla Structures model that may not have been directly specified by the user. RISAConnection has limitations and these are imposed on the Tekla Structures connections as well, which can cause automatic updates to the connection.
The RISA - Show Results  selection will open up the RISA-Tekla Link dialog showing the design results and any errors/warnings.
Note:
 button on the taskbar.

This RISA-Tekla link results browser gives an overall summary of the project, as well as allows you to view each individual connection. For each individual connection there are two tabs: Connection design and Errors/Warnings.
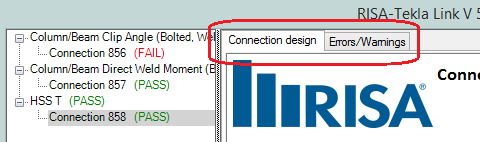

The Connection design tab will show each limit state and the corresponding Pass/Fail.
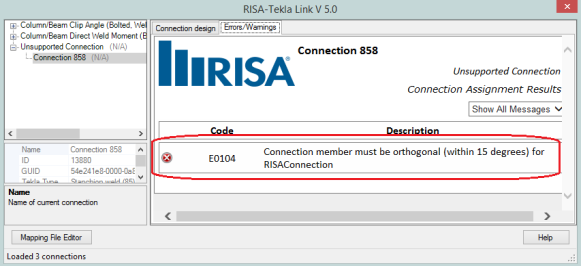
The Errors/Warnings tab will show warnings for any connection components that were not transferred, or give an error if the connection was not able to be transferred at all.
Note:
After the results are brought back into Tekla Structures the graphic view shows the connections by their color-coded results, green indicating a passing connection and red a failing connection.

Note:
When the model is transferred to RISAConnection there are two files created in the directory of the Tekla file.
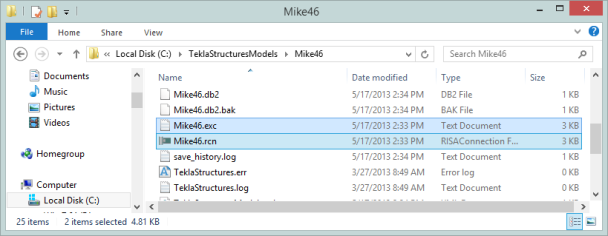
There is a ".exc" file and a ".rcn" file. The ".exc" file works as the exchange file between Tekla Structures and RISAConnection. The ".rcn" file is the RISAConnection input file. This prevents any information confusion in the link.
The RISA-Tekla Link relies on many different files to work properly. Information from Tekla Structures, RISAConnection and the RISA-Tekla Link itself is found by looking to either the registry directly, or to an INI file. Here is where we look for different items.
Note:
With the link we directly open RISAConnection. To do this we look for this RISAConnection.exe file from this location in the registry:
HKEY_LOCAL_MACHINE - SOFTWARE - Microsoft - Windows - App Paths - RISAConnection.exe
If the RISAConnection.exe is not located in this path then the link will not work properly.
Both running the RISA-Tekla Link in Tekla Structures AND sending information from RISAConnection back requires finding the TeklaLink.exe. We look in this location in the registry:
HKEY_LOCAL_MACHINE - SOFTWARE - Microsoft - Windows - App Paths - TeklaLink.exe
The RISAConnection.ini file gives the location where RISA's shape databases are located. The RISA-Tekla Link uses these shape databases to map Tekla Structures shape names to RISA shape names. Thus, the link needs to know where this file is located. It will look for the RISAConnection.ini from this location in the registry:
HKEY_CURRENT_USER - Software - RISA Technologies - RISAConnection - Version # - INI Path
The TeklaLinkInfo.ini gives the location where the RISA-Tekla Link mapping files are located. These mapping files are used to map the Tekla Structures shape names to the RISA shape names. It will look for the RISAConnection.ini from this location in the registry:
HKEY_CURRENT_USER - Software - RISA Technologies - RISATeklaLink - Version # - INI Path